
Step-by-Step Guide to Designing a Drip Irrigation System
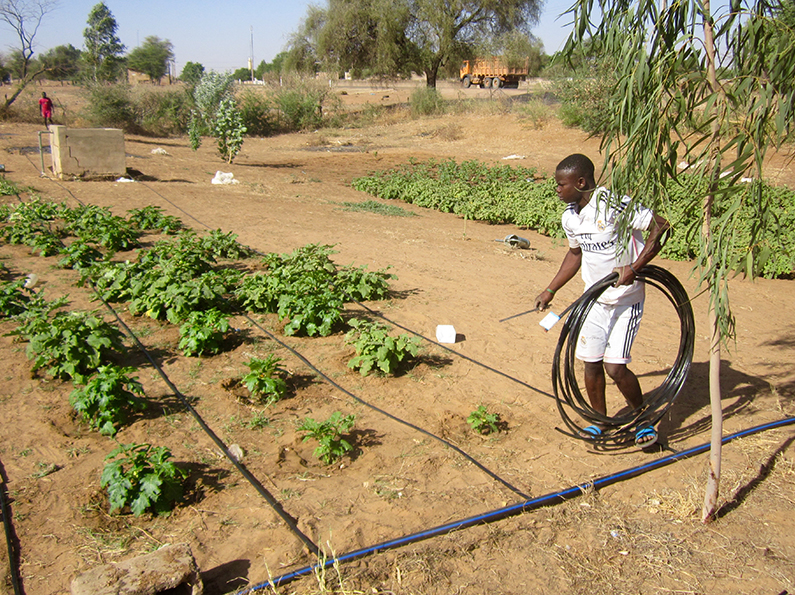
A well-planned drip irrigation system can save water, boost crop yields, and reduce labor costs. Whether you’re a small-scale farmer or managing large fields, this guide will walk you through planning, designing, and optimizing your drip irrigation setup for maximum efficiency.
Step 1: Assess Your Farm’s Needs
✅ Key Factors in Irrigation Planning
- Crop Type – Different plants have varying water needs (e.g., tomatoes vs. wheat).
- Soil Type – Sandy soil drains fast; clay retains water longer.
- Climate & Rainfall – Adjust irrigation frequency based on evapotranspiration (ET) rates.
- Water Source – Well, river, or municipal supply? Check flow rate (GPM) and pressure (PSI).
- Field Layout – Flat, sloped, or terraced? Slopes may need pressure-compensating emitters.
📌 Tools for Planning
- Soil moisture sensors (Blumat, Rain Bird)
- Weather stations (for ET data)
- Mapping software (Google Earth, FarmBot)
Lorem ipsum dolor sit amet, consectetur adipiscing elit. Ut elit tellus, luctus nec ullamcorper mattis, pulvinar dapibus leo.
Step 2: Calculate Water Requirements
How Much Water Do Your Crops Need?
- General rule: Most crops need 0.5–1.5 inches of water per week.
- Formula:
Daily Water Need (GPH) = (Crop Water Requirement × Area) ÷ Irrigation Efficiency- Example: A 1000 sq. ft. tomato field needing 1″ per week (~0.14″ per day) with 90% efficiency:
(0.14 × 1000) ÷ 0.90 ≈ 155 gallons/day
- Example: A 1000 sq. ft. tomato field needing 1″ per week (~0.14″ per day) with 90% efficiency:
Flow Rate Check
- Ensure your water source can supply enough GPM for all emitters.
- Example: 200 emitters at 1 GPH each = 3.3 GPM required.
Step 3: Design the System Layout
A. Mainline & Submain Pipes
- Mainline (1–2″) – Connects to water source.
- Submains (½–1″) – Branch off to different zones.
B. Drip Lines & Emitter Placement
| Crop Type | Emitter Spacing | Flow Rate (GPH) |
|---|---|---|
| Vegetables | 12–18 inches | 0.5–1 GPH |
| Fruit Trees | 2–3 feet | 2–4 GPH |
| Row Crops (Corn, Cotton) | 18–24 inches | 1–2 GPH |
C. Valve Zones
- Divide fields into separate zones for different crops or watering schedules.
- Use solenoid valves + controller for automation.
Step 4: Select Components
Must-Have Parts
- Filters – Screen, disc, or sand (prevents clogs).
- Pressure Regulator – Keeps PSI at 10–30.
- Emitters – Pressure-compensating for slopes.
- Backflow Preventer – Avoids contamination.
- Timer/Smart Controller – Automates watering.
Optional Upgrades
- Soil sensors – Adjusts watering in real time.
- Weather-based controllers – Uses ET data.
- Mobile alerts – Notifies leaks or failures.
Step 5: Install the System
🔧 Step-by-Step Installation
- Lay mainline tubing along the field perimeter.
- Install filters & pressure regulators near the water source.
- Connect submains with valves for each zone.
- Punch holes & insert emitters (or use pre-installed drip tape).
- Flush the system before final use.
- Test for leaks and adjust emitter flow.
📌 Pro Tips
- Use goof plugs to fix misplaced holes.
- Elevate drip lines in sandy soil to prevent clogging.
- Mark zones for easy maintenance.
Step 6: Optimize Irrigation Scheduling
Best Practices for Water Management
✔ Water early morning to reduce evaporation.
✔ Adjust for rainfall (use weather data).
✔ Monitor soil moisture (avoid overwatering).
✔ Cycle & soak – Run short cycles to prevent runoff.
Sample Schedule for Tomatoes
| Growth Stage | Frequency | Duration |
|---|---|---|
| Seedling | Every 2 days | 15 mins |
| Flowering | Daily | 20 mins |
| Fruiting | Daily | 30 mins |
Step 7: Maintain Your System
Monthly Checklist
🔹 Clean filters (prevents clogs).
🔹 Check for leaks (fix with couplers).
🔹 Flush drip lines (remove sediment).
🔹 Inspect emitters (replace clogged ones).
Yearly Maintenance
- Replace worn tubing.
- Re-calibrate sensors & controllers.
Step 8: Upgrade to Smart Irrigation
Tech That Improves Efficiency
📱 Smartphone-controlled systems (Rachio, Orbit B-hyve).
🌦 Weather-based ET controllers (adjusts for rain).
🛰 Satellite/drone imaging – Detects dry zones.
Conclusion: Why Proper Planning Matters
A well-designed drip irrigation system:
✔ Saves 30–60% more water than flood irrigation.
✔ Increases yields with precise watering.
✔ Reduces labor & energy costs.
By following this step-by-step guide, you can create a customized, efficient irrigation plan that fits your farm’s needs.
